Looking for a beautiful, natural way to decorate Easter eggs this year? Learn how to make homemade egg dye using simple groceries from your kitchen—and turn it into a fun science experiment your kids will love.
For the last five years, my kids and I have made natural dyes to color our Easter eggs. It’s surprisingly easy to create vibrant, safe, and eco-friendly dyes using vegetables and spices you probably already have on hand.
This year, since my middle schooler is studying chemistry, we put a scientific spin on our tradition by comparing how dye colors changed when we added an acid (vinegar) or a base (baking soda). The results were fascinating!
Why Make Natural Egg Dye?
Making your own natural dye has many benefits:
- Avoid synthetic chemicals found in commercial dye kits.
- Gentler on little hands and easier to clean up—natural dyes often stain less than synthetic ones.
- Educational and creative—the process inspires curiosity and wonder in kids of all ages.
- Eco-conscious and beautiful—you get earthy, nuanced tones that feel special and unique.
Many natural dyes are photosensitive, which means if you spill them on clothes, sunlight can often bleach the stain out—a win for parents!
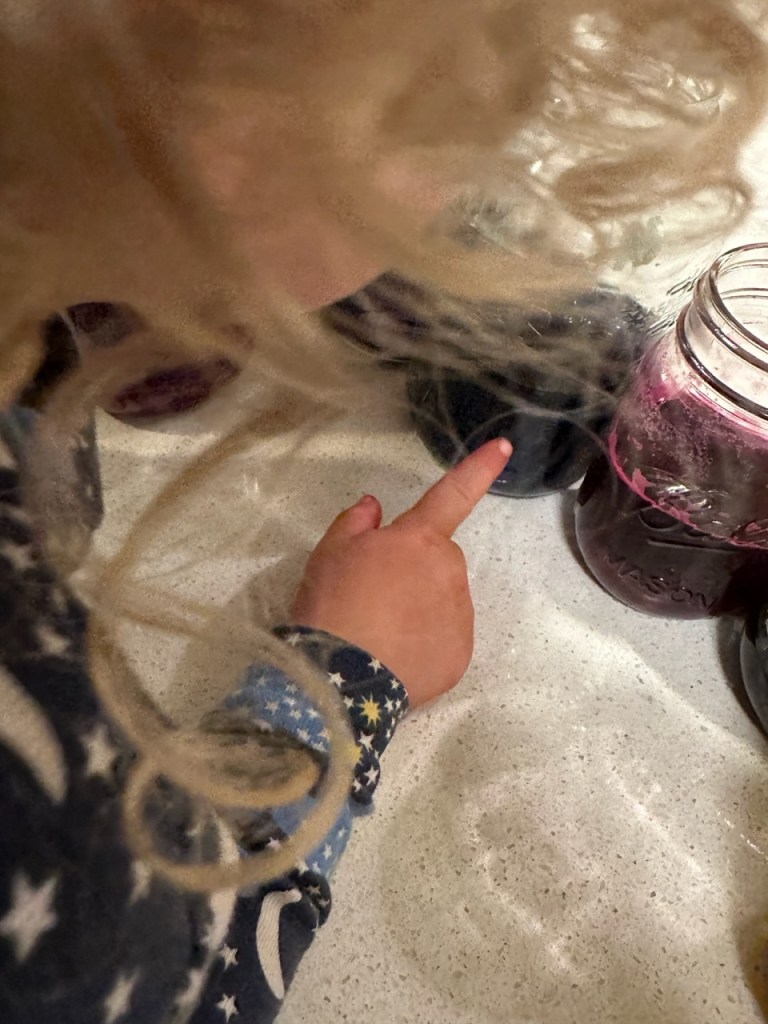
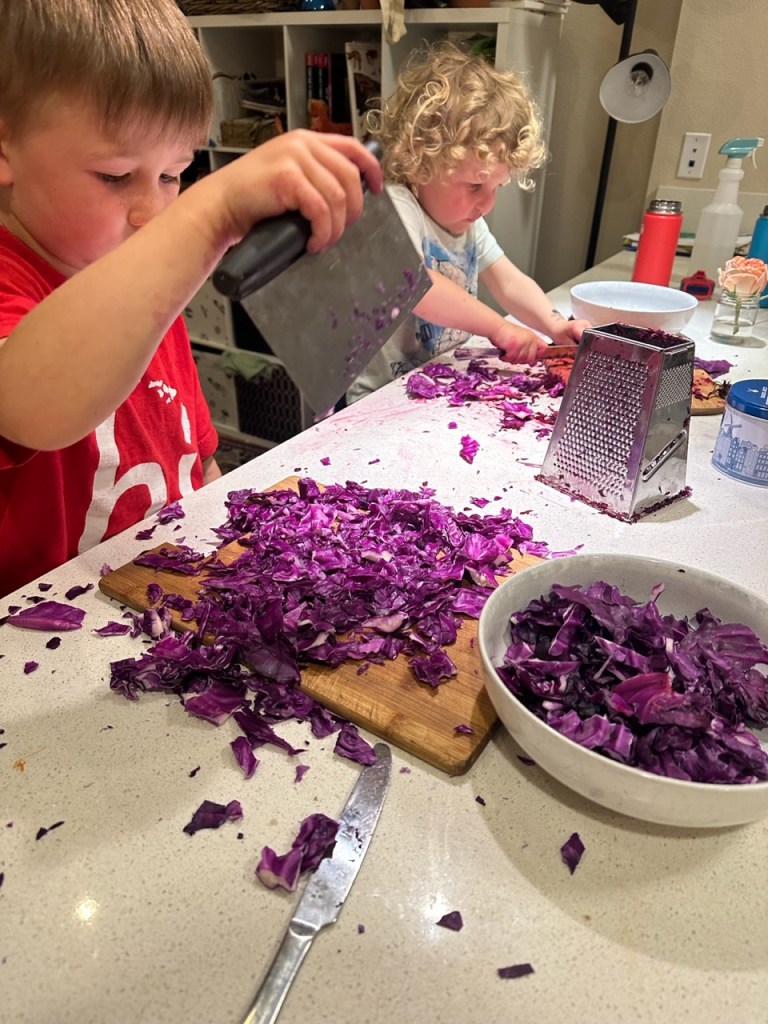
More than that, this activity is a rich sensory experience. Kids get to shred, chop, stir, and observe. It strengthens fine motor skills, encourages independence, and invites critical thinking as they experiment with color changes and pH.
What You’ll Learn in This Post
- The chemistry behind natural dyes and how pH affects color
- Step-by-step instructions for making dyes using red cabbage, turmeric, and beets
- Easy instructions for dyeing your eggs
- Tips for getting the most vibrant, lasting colors
- Bonus science tidbits to share with your kids
Color Chemistry: What’s in the Dye?
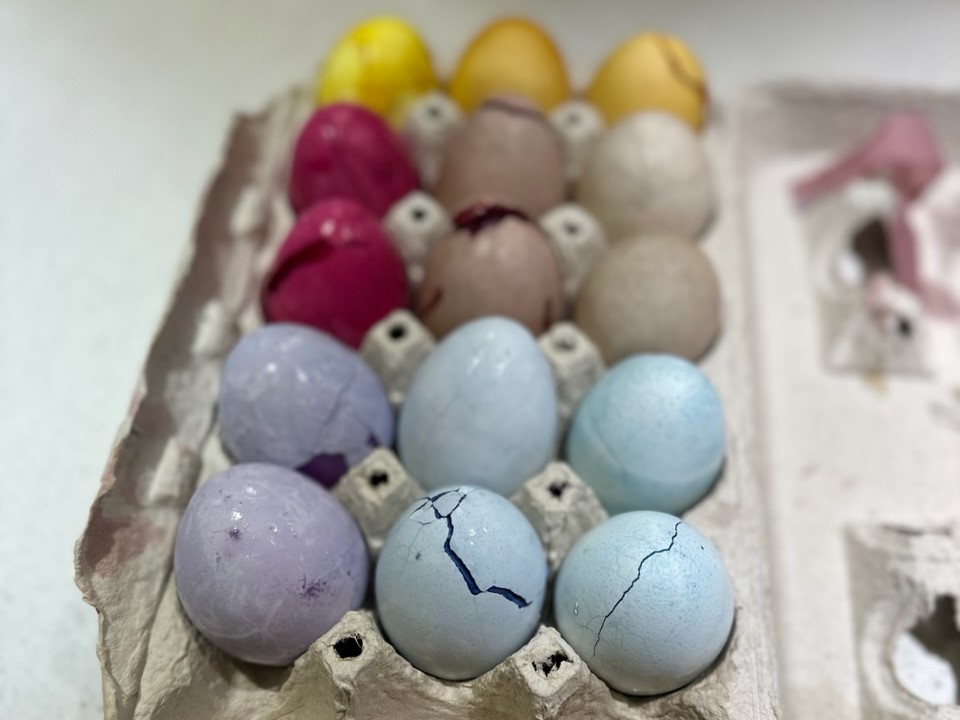
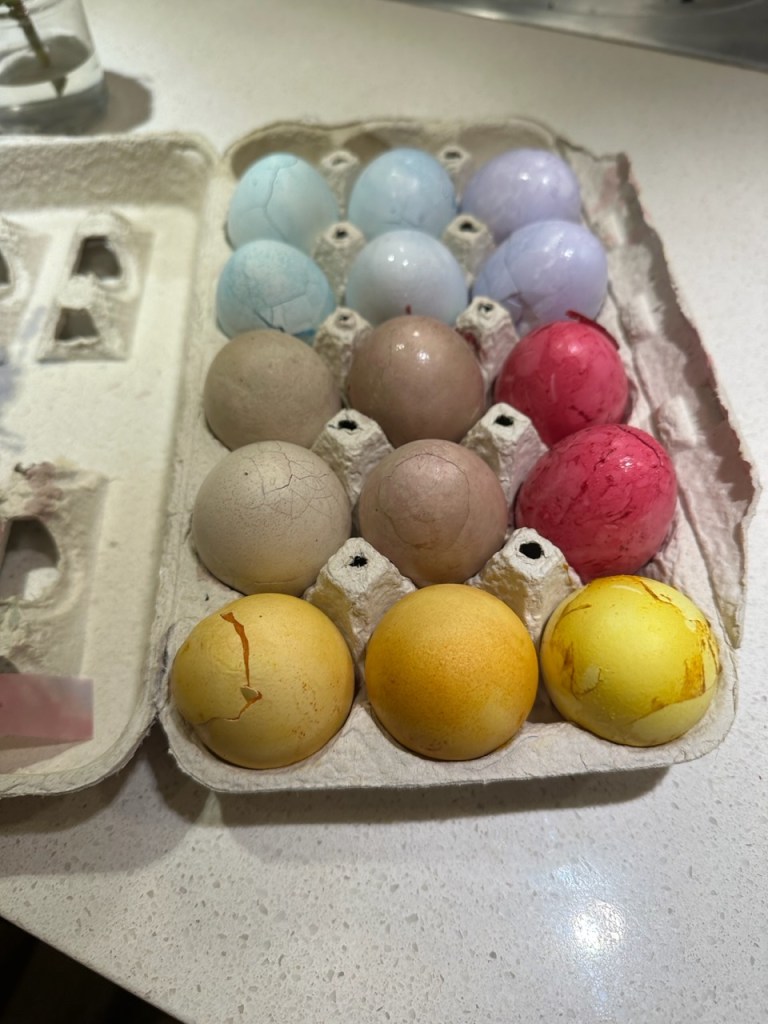
- Red Cabbage contains anthocyanins—they turn pink in acid and blue in base.
- Turmeric contains curcumin—yellow in acid or neutral conditions, but rust-orange in base.
- Beets contain betalains—deep red in neutral, hot pink in acid, and purple in base.
Kid-Friendly Experiment Ideas
- Change the pH of your cabbage dye with baking soda or lemon juice—watch the color shift!
- Compare dye strength using hot water vs. cold water
- Try layering colors on your eggs for a marbled effect
Supplies You’ll Need
Ingredients
- Red cabbage
- Turmeric powder
- Beets
- Vinegar
- Baking soda
- Water
- 18 white eggs
Materials
- Tea kettle
- Strainer
- Mason jars or bowls
- Spoons, tongs, or slotted spoon
- Paper towels or a drying rack
- Optional: masking tape or labels for your dye jars
How to Make Natural Dyes
Red Cabbage – Pink, Purple, and Blue
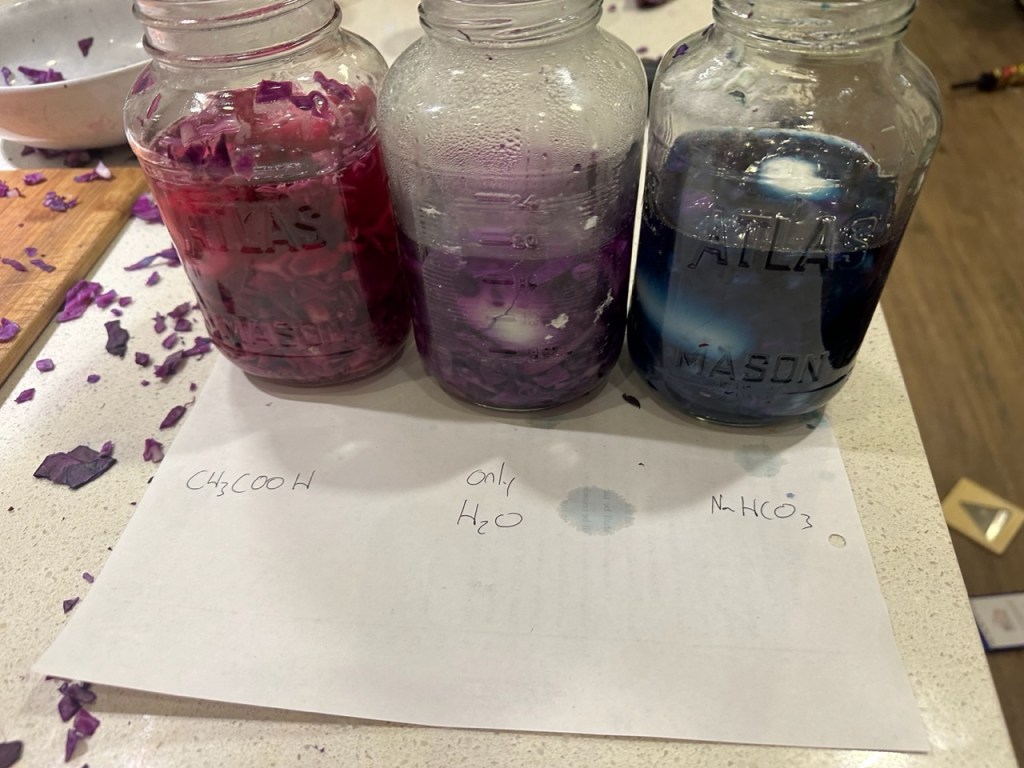
- Chop half a red cabbage.
- Add ½ cup of cabbage to three mason jars.
- Pour 1 cup boiling water into each jar.
- To one jar, add ¼ cup vinegar (watch it turn pink!).
- To another jar, add 1 tsp baking soda (it will turn blue!).
- Leave the third jar as is for a purple neutral base.
- Add 2 hard-boiled eggs to each jar and soak.
Turmeric – Yellow to Rust
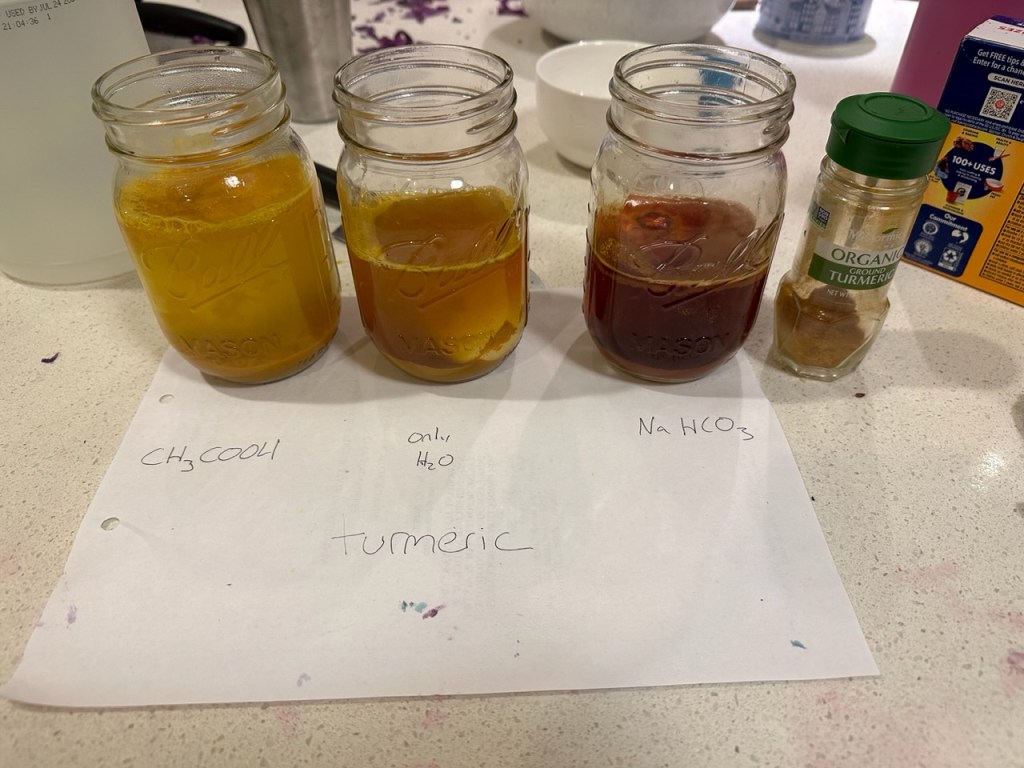
- Add 1 Tbsp turmeric to three mason jars.
- Pour 1 cup boiling water into each jar.
- Add ¼ cup vinegar to one jar (bright yellow!).
- Add 1 tsp baking soda to another (rusty red-orange!).
- Leave one jar neutral for a soft yellow.
- Add 2 hard-boiled eggs to each and soak.
Beets – Hot Pink to Mauve
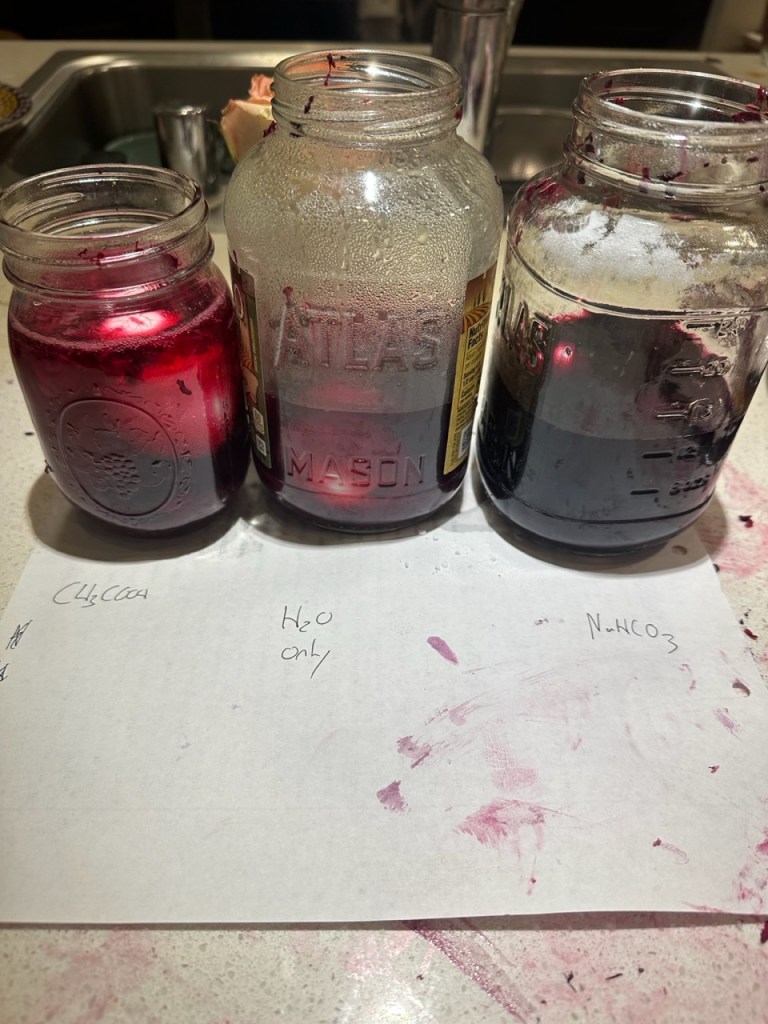
- Shred one large beet.
- Add ½ cup of beet to three mason jars.
- Pour in 1 cup boiling water.
- Add ¼ cup vinegar to one jar (watch it turn hot pink!).
- Add 1 tsp baking soda to another (purple hue).
- Leave one neutral for a deep red.
- Add 2 hard-boiled eggs to each.
How to Hard-Boil Eggs
Step-by-Step:
- Place 18 eggs in a pot of cool water.
- Bring the water to a boil.
- Turn off the heat and cover. Let sit for 10–12 minutes.
- Transfer eggs to cold water to cool.
Tips for Best Results
- Use white eggs for more vibrant colors.
- Let your dyes cool before adding eggs to avoid overcooking.
- Gently rotate eggs for even coverage.
- Layer dyes or use a second color after drying for added depth.
- Try natural resist techniques like wrapping with rubber bands or pressing leaves to the egg before dyeing.
Science Corner: What’s Happening Here?
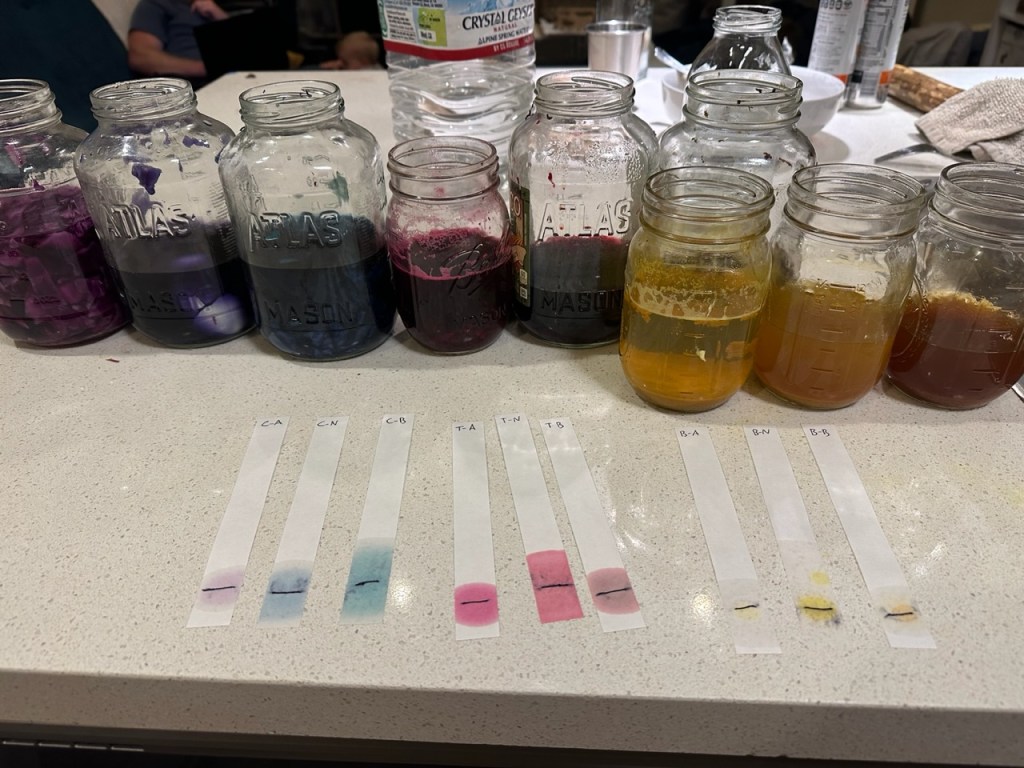
This project is a colorful introduction to acids, bases, and pH indicators.
The chemical pigments in vegetables react to changes in pH. Vinegar (acid) and baking soda (base) cause the natural dyes to shift colors—just like in pH test strips!
It’s an easy, hands-on way to talk about the science of color, chemical reactions, and how everyday kitchen ingredients can be used for experimentation.
FAQs
Can I use brown eggs?
Yes, but the colors will be more muted and earthy.
How long do dyed eggs last?
Store them in the fridge and eat within a week.
Can I use other vegetables or spices?
Absolutely! I’ve had great results with red and yellow onion skins, hibiscus petals, black beans (blue!), and even avocado skins (pink!). The possibilities are endless.
The Best Natural Egg Dye at the Store

Last year we bought Natural Earth Paint Dye Kits at Whole Foods to dye eggs with family and we were very impressed with how vibrant the colors were and how easy it was to dye the eggs.
I highly recommend using this kit if you want to purchase a plant based egg dying kit.
Wrap-Up
Natural egg dyeing is a little messy, a little magical, and totally worth it. It’s a memory-maker and a learning opportunity rolled into one.
Your kids will remember the scent of the beets, the feel of the cabbage, and the excitement of watching the colors change right before their eyes.
Leave a comment if you’d like a printable dye chart or a bonus science activity guide—I’d love to share!


Leave a comment